This article explains how to create a Wayfair Listing Settings within ChannelUnity.
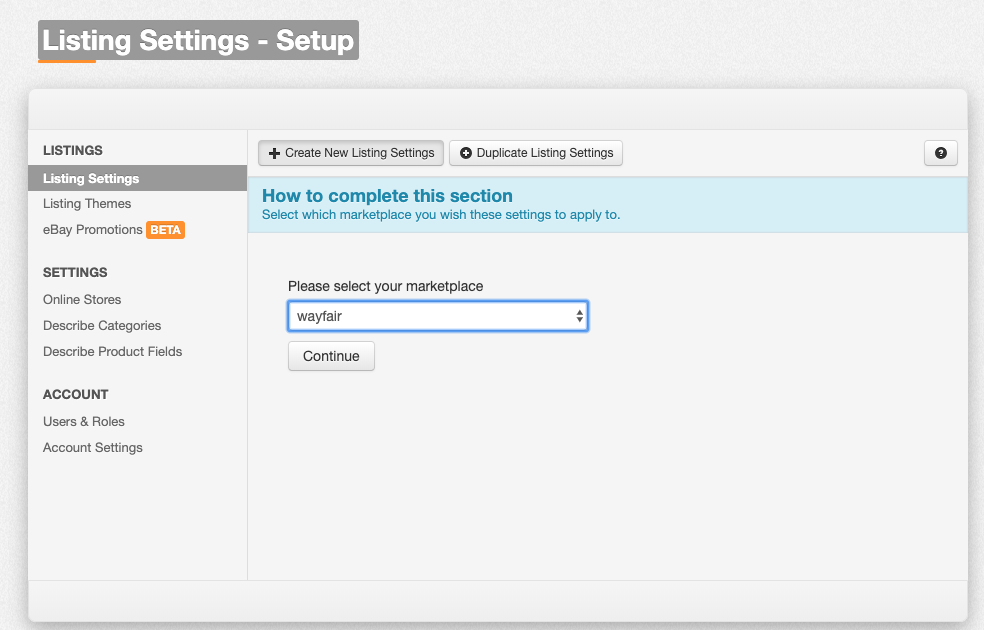
Log into ChannelUnity, navigate to Setup > Listing Settings, and select Create New Listing Settings.
This will then bring you to a screen as above. Using the Please select your marketplace drop down, select Wayfair and click Continue to create a Wayfair listing setting.
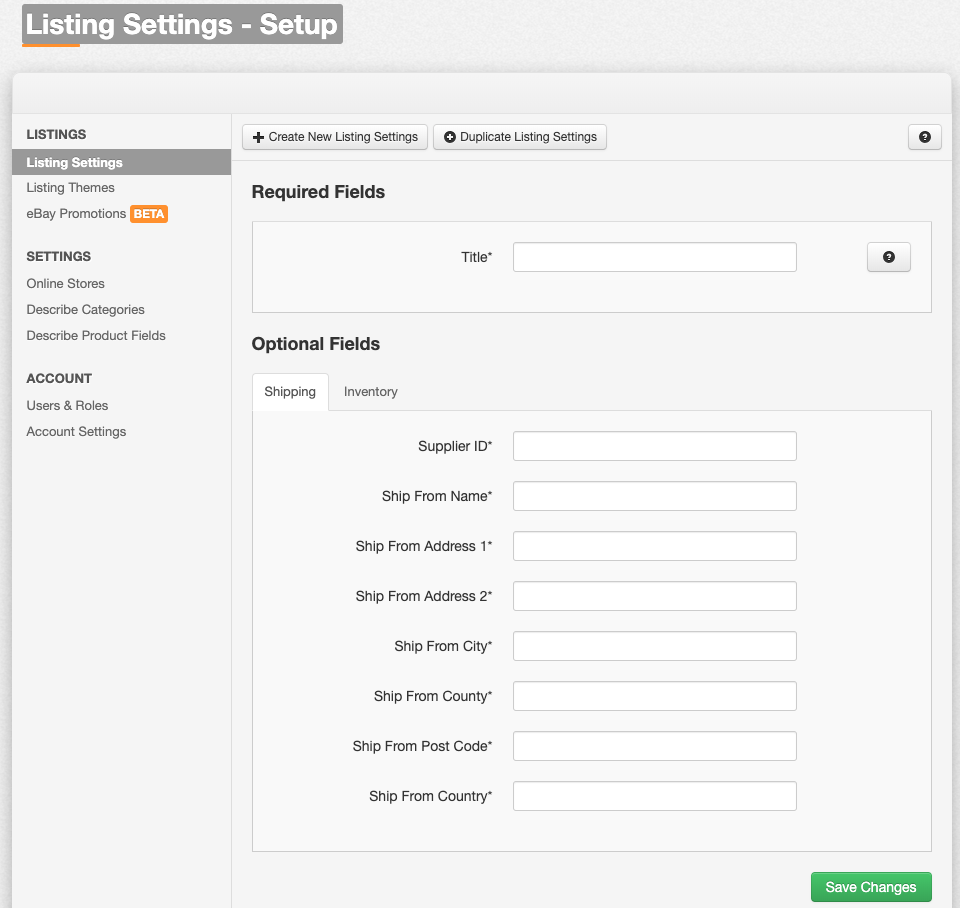
A page will appear showing a Shipping tab and an Inventory tab.
Shipping

The fields marked with an asterisk are essential for creating listing settings on Wayfair. Ensure these fields are filled out correctly to prevent errors when listing.
Title: Enter a name for the Wayfair Listing Setting.
Ship From Name: Enter the name of your company
Ship From Address 1: Address it’s shipping from.
Ship From Address 2: Second part of the address.
Ship From City: City name
Ship from County: County or state name
Ship From Post Code: postal code of the address.
Ship From Country: country of address.
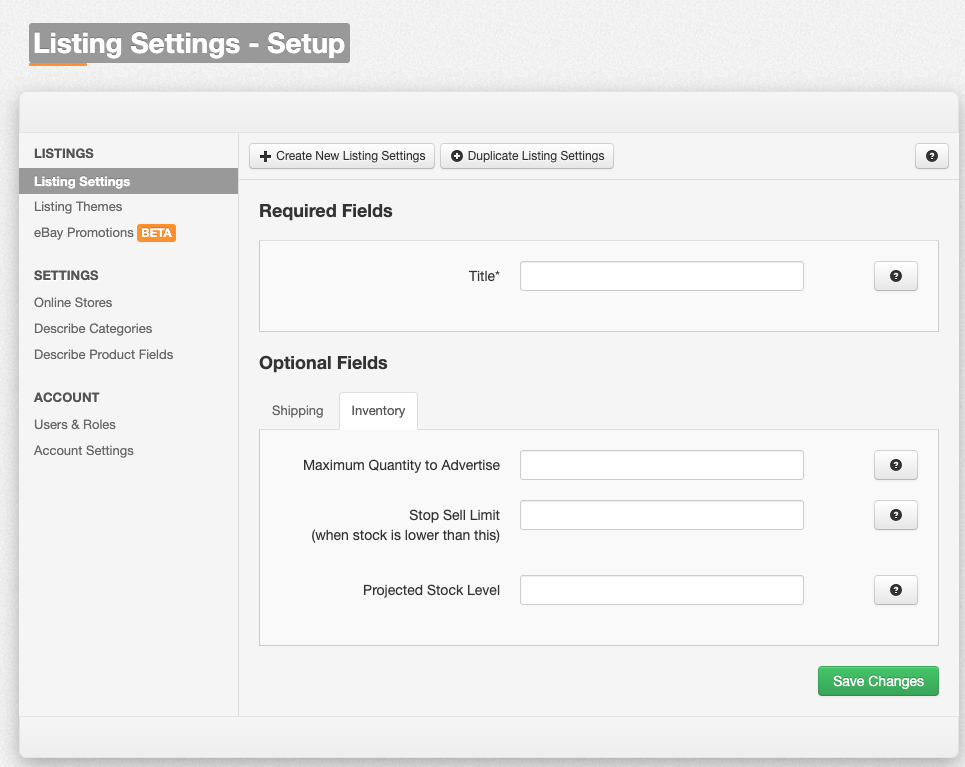
Inventory

Inventory tab allows the quantity of products to be manipulated when listing to Wayfair.
Maximum Quantity to Advertise – This advertises the number of items in stock. When this number is reached, it will begin to reflect the true stock value again. For example, if set it to 5, but there are 10 in stock in store, ChannelUnity will update Wayfair with the stock level of 5, until the actual quantity is 4, where it will show the availability as 4, then 3 and so on until the item has sold out.
5, and 10 in stock, ChannelUnity will continue to list and update stock as usual until the stock reaches 4. Once 4 is reached ChannelUtiy will send a quantity of 0 to Wayfair to end the listing.
Projected Stock Level – This field sets a static quantity value regardless of actual stock. For example the value is set to 5, then stock will always show 5 available on Wayfair even there stock is 0.

