This article will show you how to begin listing your products to a marketplace using ChannelUnity.
To start, log into your ChannelUnity account.
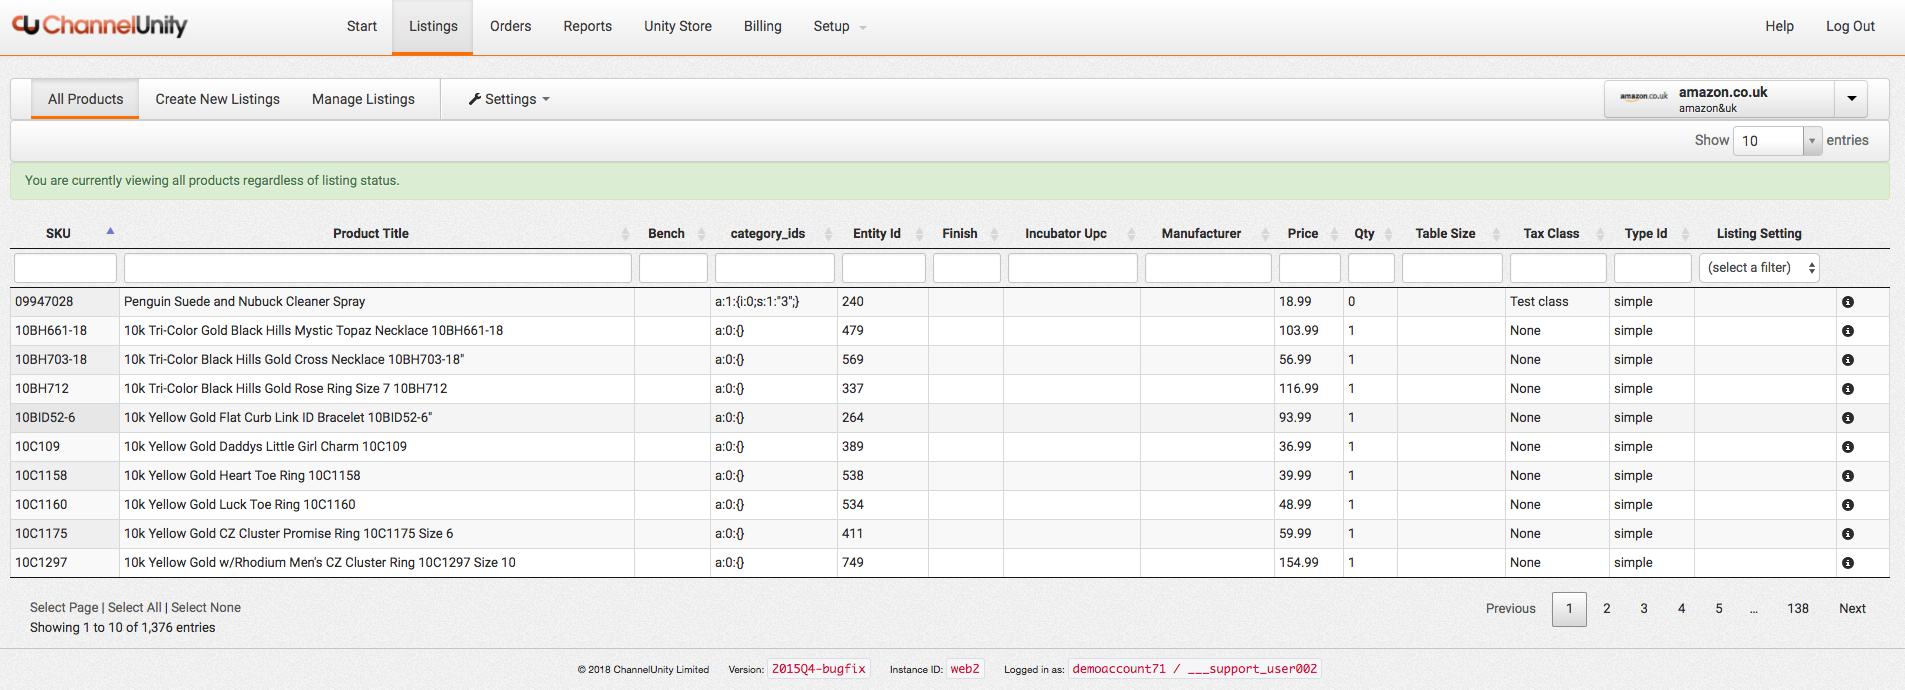
Then, click on ‘Listings’ on the top menu, this should bring you to a screen that looks like this:
On the top right you will see the currently selected marketplace. If you have more than one marketplace connected, use the drop-down menu to select the marketplace you wish to list to.
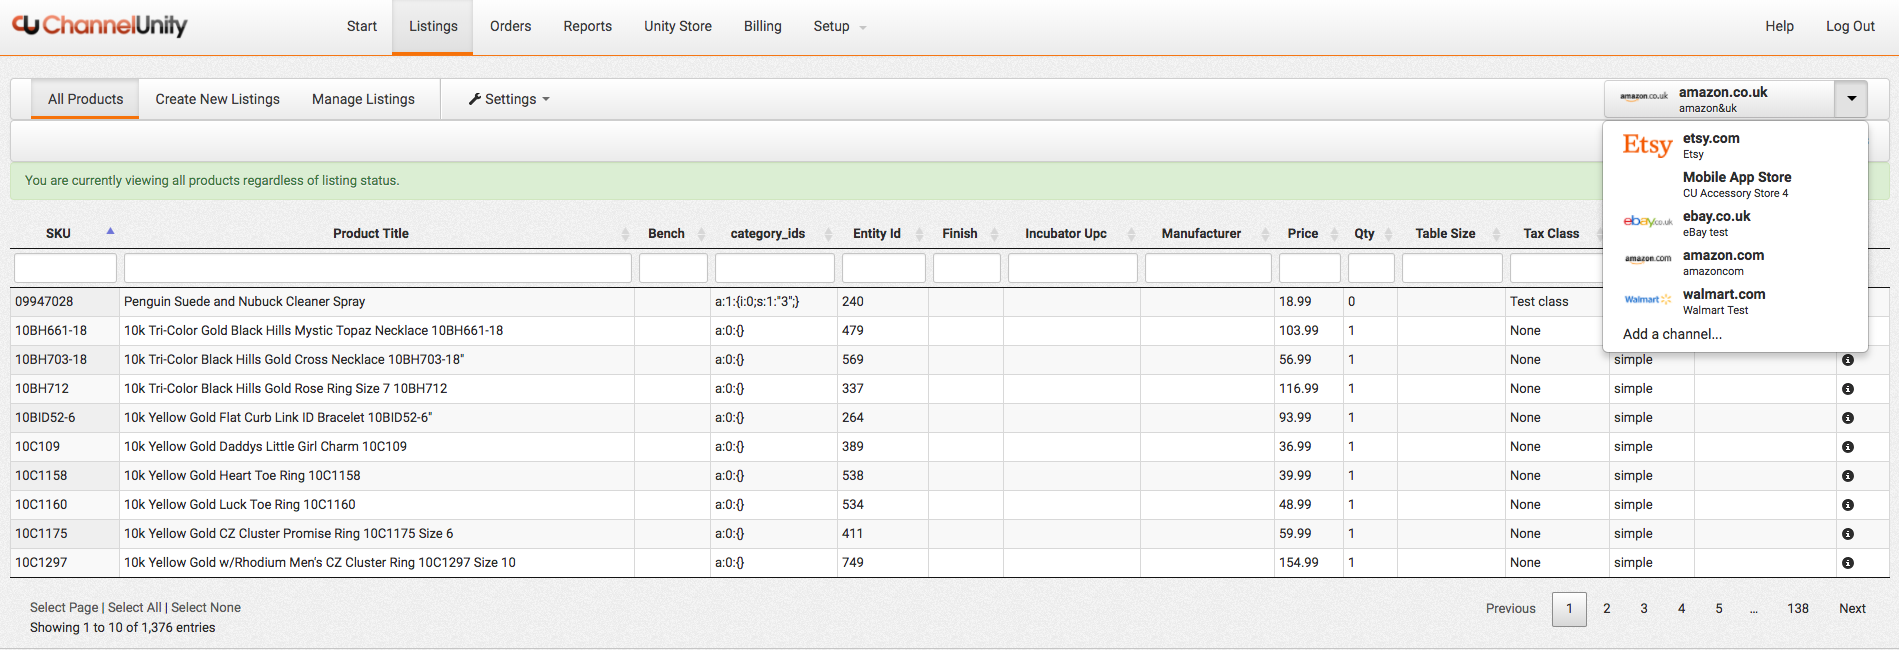
Of the three Menu tabs on the top left, “All Products” will show all the products that have been synced from your connected store. In order to begin listing products, select the ‘Create New Listings’ tab, and then click the ‘Not Listed’ sub menu tab.
In the list of products below, select those you wish to list on the chosen marketplace. You are able to select multiple products at the same time (See listing multiple products further down), though we suggest your first listing upload is a single product. Once the product is highlighted, click on the “Actions” tab which will open a drop-down menu, and your screen should now look similar to below:
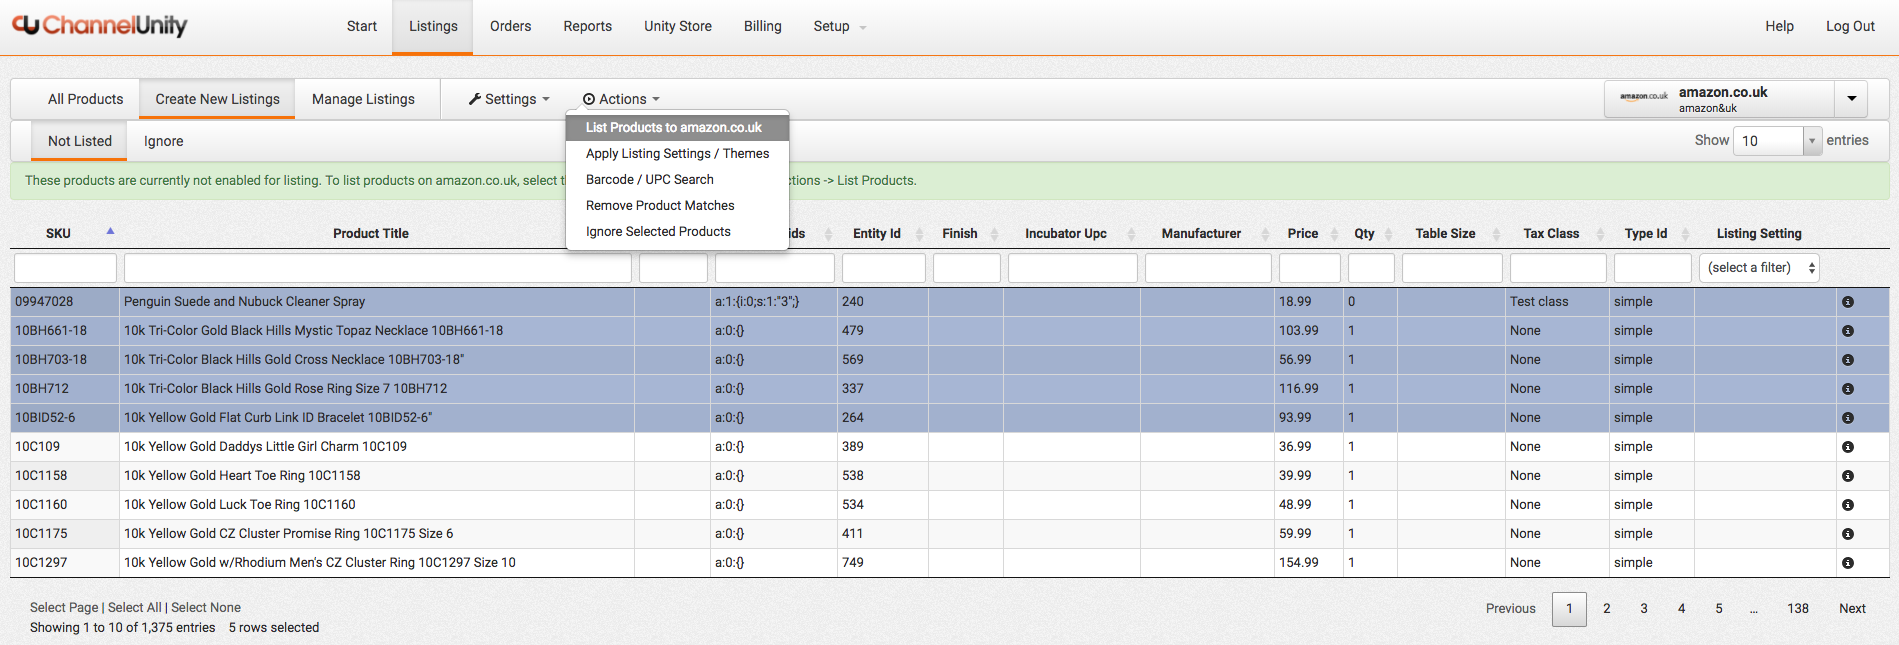
Select “List Products to …”, which will then instruct ChannelUnity to begin uploading the product to the marketplace in order to create a listing. ChannelUnity will run through some listing pre-checks to ensure the listing will not return some common errors due to missing data, such as barcodes/product ID or to ensure parent and child products are uploaded together for variation products.
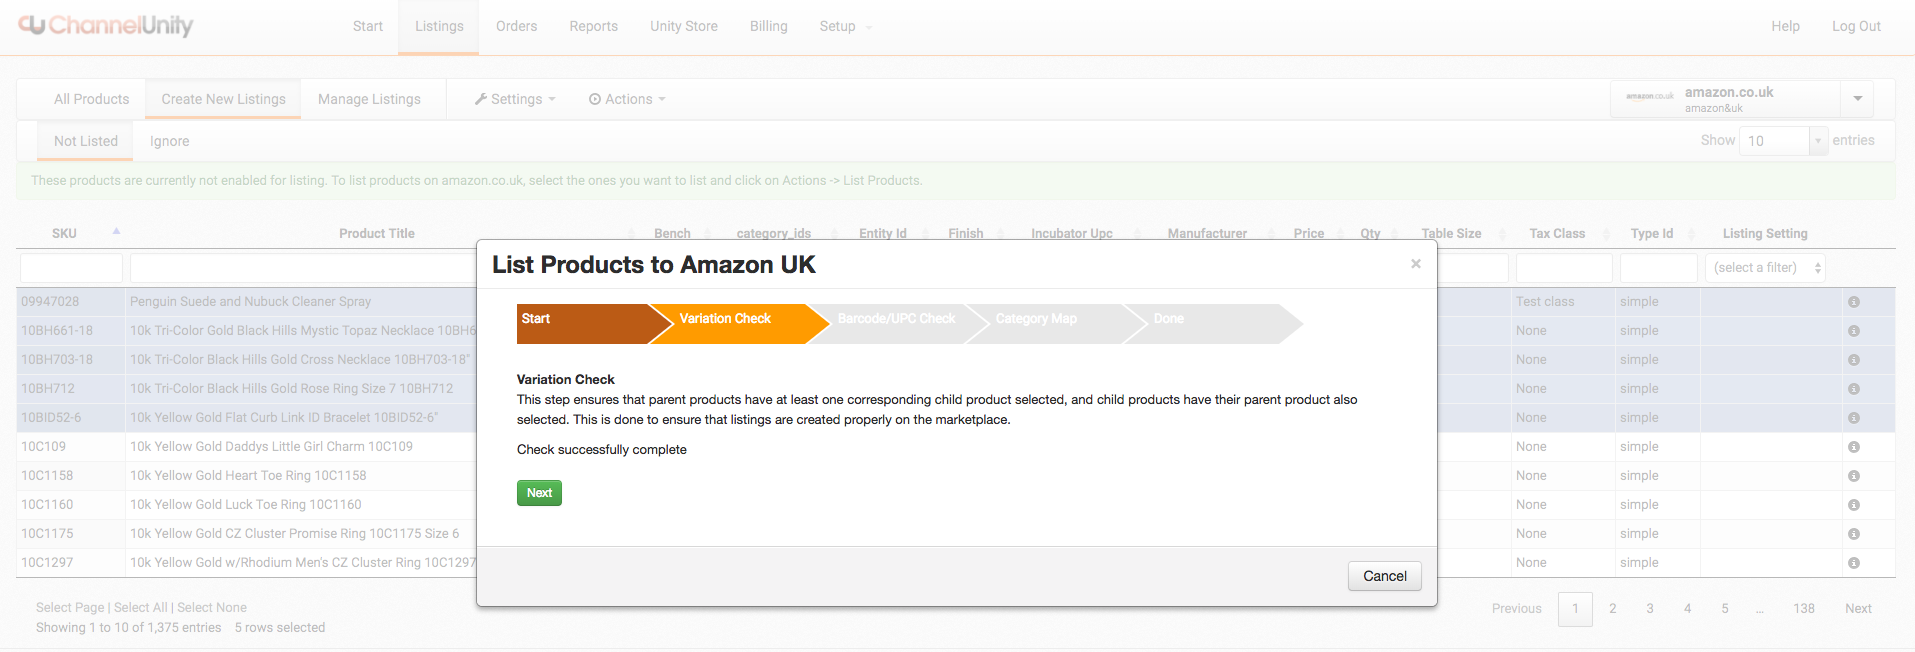
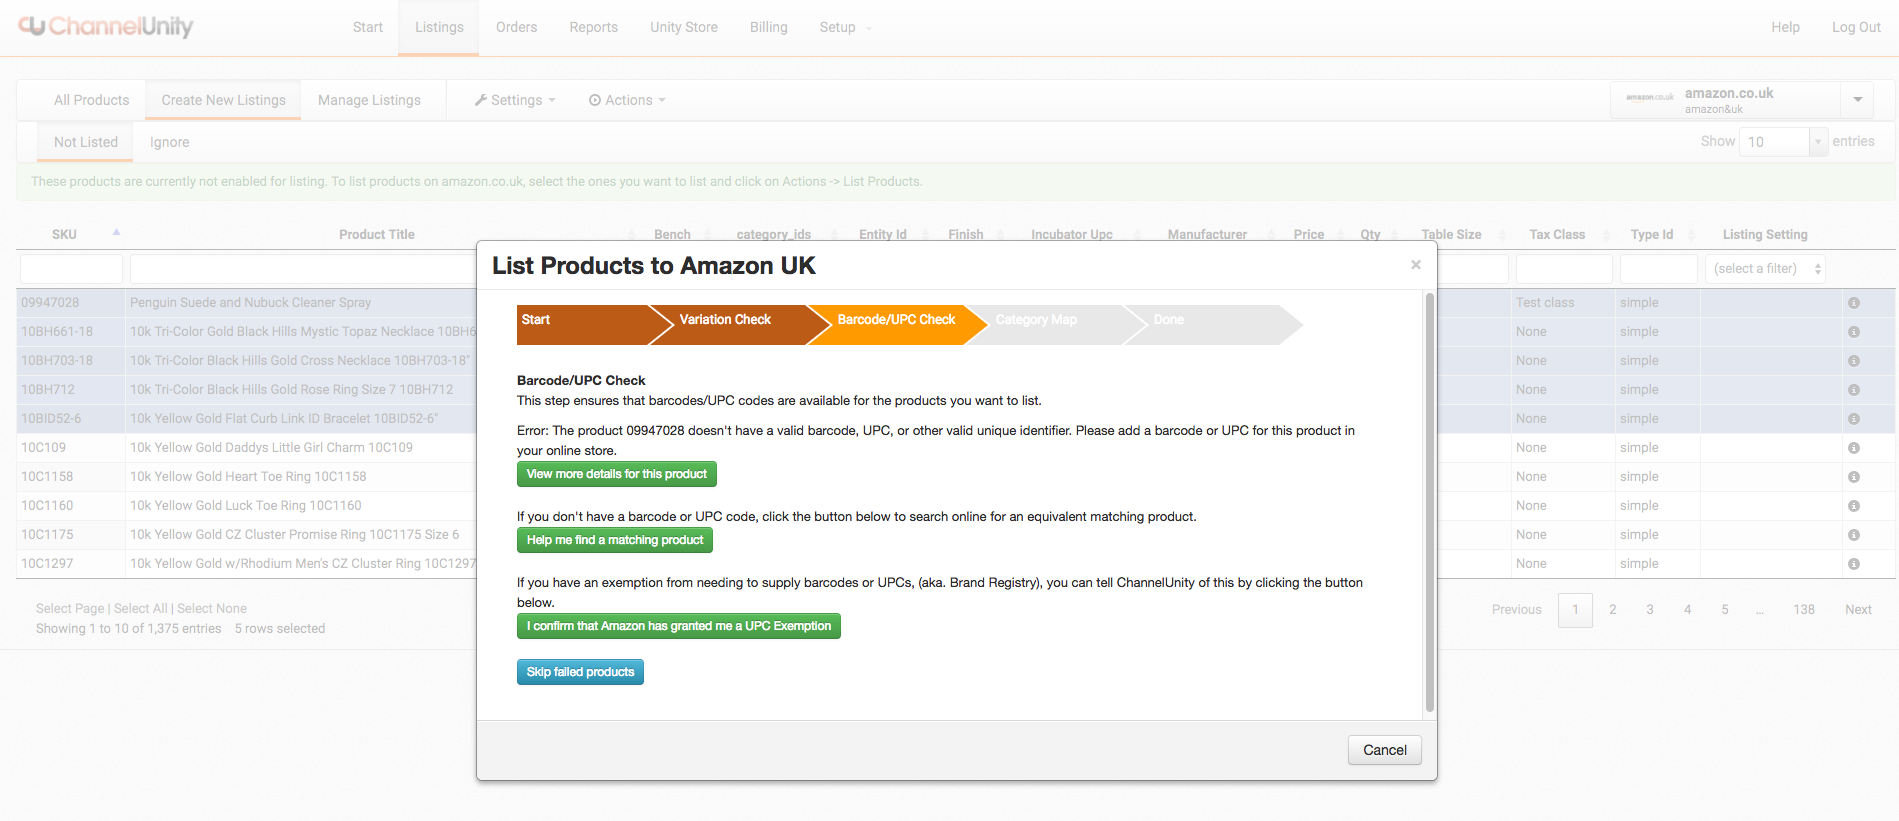
Click next to run through these pre-checks. If any of these flag up an issue, it will need to be resolved. For Barcodes/UPCs, you can use our barcode search tool included in the wizard. With variations, there will be a button to automatically add parent/variation to the upload list.
Once this step is completed, to check on this, click the “Manage Listings” tab along the top, which will then have further sub tabs, “Uploading”, “Fix Required”, “Listed” and “Paused”.

Your products will initially appear under Uploading. The time taken to upload can vary, depending on the marketplaces processing of the product data and creating the Listing. Once the product is accepted by the marketplace, it will be removed from the “Uploading” tab and appear under either “Fix Required” or “Listed”.
“Fix Required” means that Amazon has rejected the listing. You will need to look in this tab to determine the error returned by Amazon, where Channel Unity will either explain what the issue is in easily understood terms, or you can contact our Support team in order to resolve.
“Listed” means that the product data has been accepted by the marketplace, and a Listing page is being created. Again, the time before the actual page is created varies depending on the Marketplace processing, but at this stage you need take no further actions as the product listing will be created on the marketplace.
Listing Multiple Products:
Hold the CTRL key and click the items in a list to choose them. Click all the items you want to select. They don’t have to be next to each other. Click any item again to deselect it.
If you want to select items that are adjacent, you can use the SHIFT key. Click the first item, then press the SHIFT key and hold it. Click the last item and release the SHIFT key.
You can also use both SHIFT and CTRL keys together. For example: You can deselect an item from a row selection that you have created with the SHIFT key when you hold the CTRL key and click the item you want to deselect.
Finally, at bottom of the page you can simply select either the page, or all products (all products is limited to listing 10,000 products at a time).
Listing Variation Products:
In ChannelUnity, your variation products (and their parent) will appear as separate items, however they will list as variations when uploaded to the marketplace.
You don’t need to select all your variations along with the parent to list them, but you can still do this if there are only certain variations you wish to list.
Instead, simply locate the parent SKU and select only this to list. You will then be prompted to list all variants in the 1st step of the listing wizard.
Select that then proceed as you would listing any other product.
Resolving issues reported by the wizard:
You have the option to skip listing all the products that fail the checking process performed by our wizard, but if you wish fix them please see below:
Barcode Problem:
This could be an empty value or invalid value.
Review the attribute you have chosen in your field mappings for UPC/Barcode, then check out the specific value for that product.
You can do this by going to Listings > All Products > (i) icon to view more details.
Scroll down to the bottom of the data to see all fields for that product we have imported into ChannelUnity.
If you don’t see the field at all then the product has no barcode data and will need it populating. Otherwise please contact your supplier or other data source for a correct barcode for the product.
You can choose to display the your Barcode attribute in the interface for easier reference by going to Listings > Settings > Select Columns.
Enable the attribute that is mapped to the UPC/Barcode field, and it will now appear in the ChannelUnity interface.
Category Mapping problem:
Error: No category found for your online store
This means the product doesn’t belong to any category in your online store, or ChannelUnity has yet to import that category.
Please check your website data. If the product belongs to a category, you can force it to import by going to Setup > Online Stores > Green sync button.
After a minute or so, the category should now be in our system ready for mapping in Setup > Describe Categories.
Error: A ChannelUnity category has not been provided.
This is slightly different to the above. We have the store category in our system, but it has yet to be mapped to a ChannelUnity category.
Go to Setup > Describe Categories and map the necessary category, although you can also do this at the time the wizard brings up the error.
For more details on mapping categories, please see: https://kb.channelunity.com/article/describe-categories/

